How to take photos of your damage:
a guide to submitting photos for your repair application
Crotch photos
First, get a good light - overhead or natural non-sunny daylight if possible works best.
Second, place your jean waist down on a table or the floor. Hold your jeans so the back two panels of the crotch are visible as well as the seam joining the front and back of the jean, as shown in photo A. (Having someone help take photos will produce the best results)
If you don’t have any damage to the crotch, you don’t need to include photos of it in your application :)
Crotch photos Part 2
Now pull gently on the seam that runs from the front of the crotch to the back of the jean, as shown in photo B.
Crotch photos Part 3
Turn the jean inside out and pull the inseam gently as pictured. This allows me to see the extent of the damage near the inseam (see photo C).
taking photos of other weird wear areas
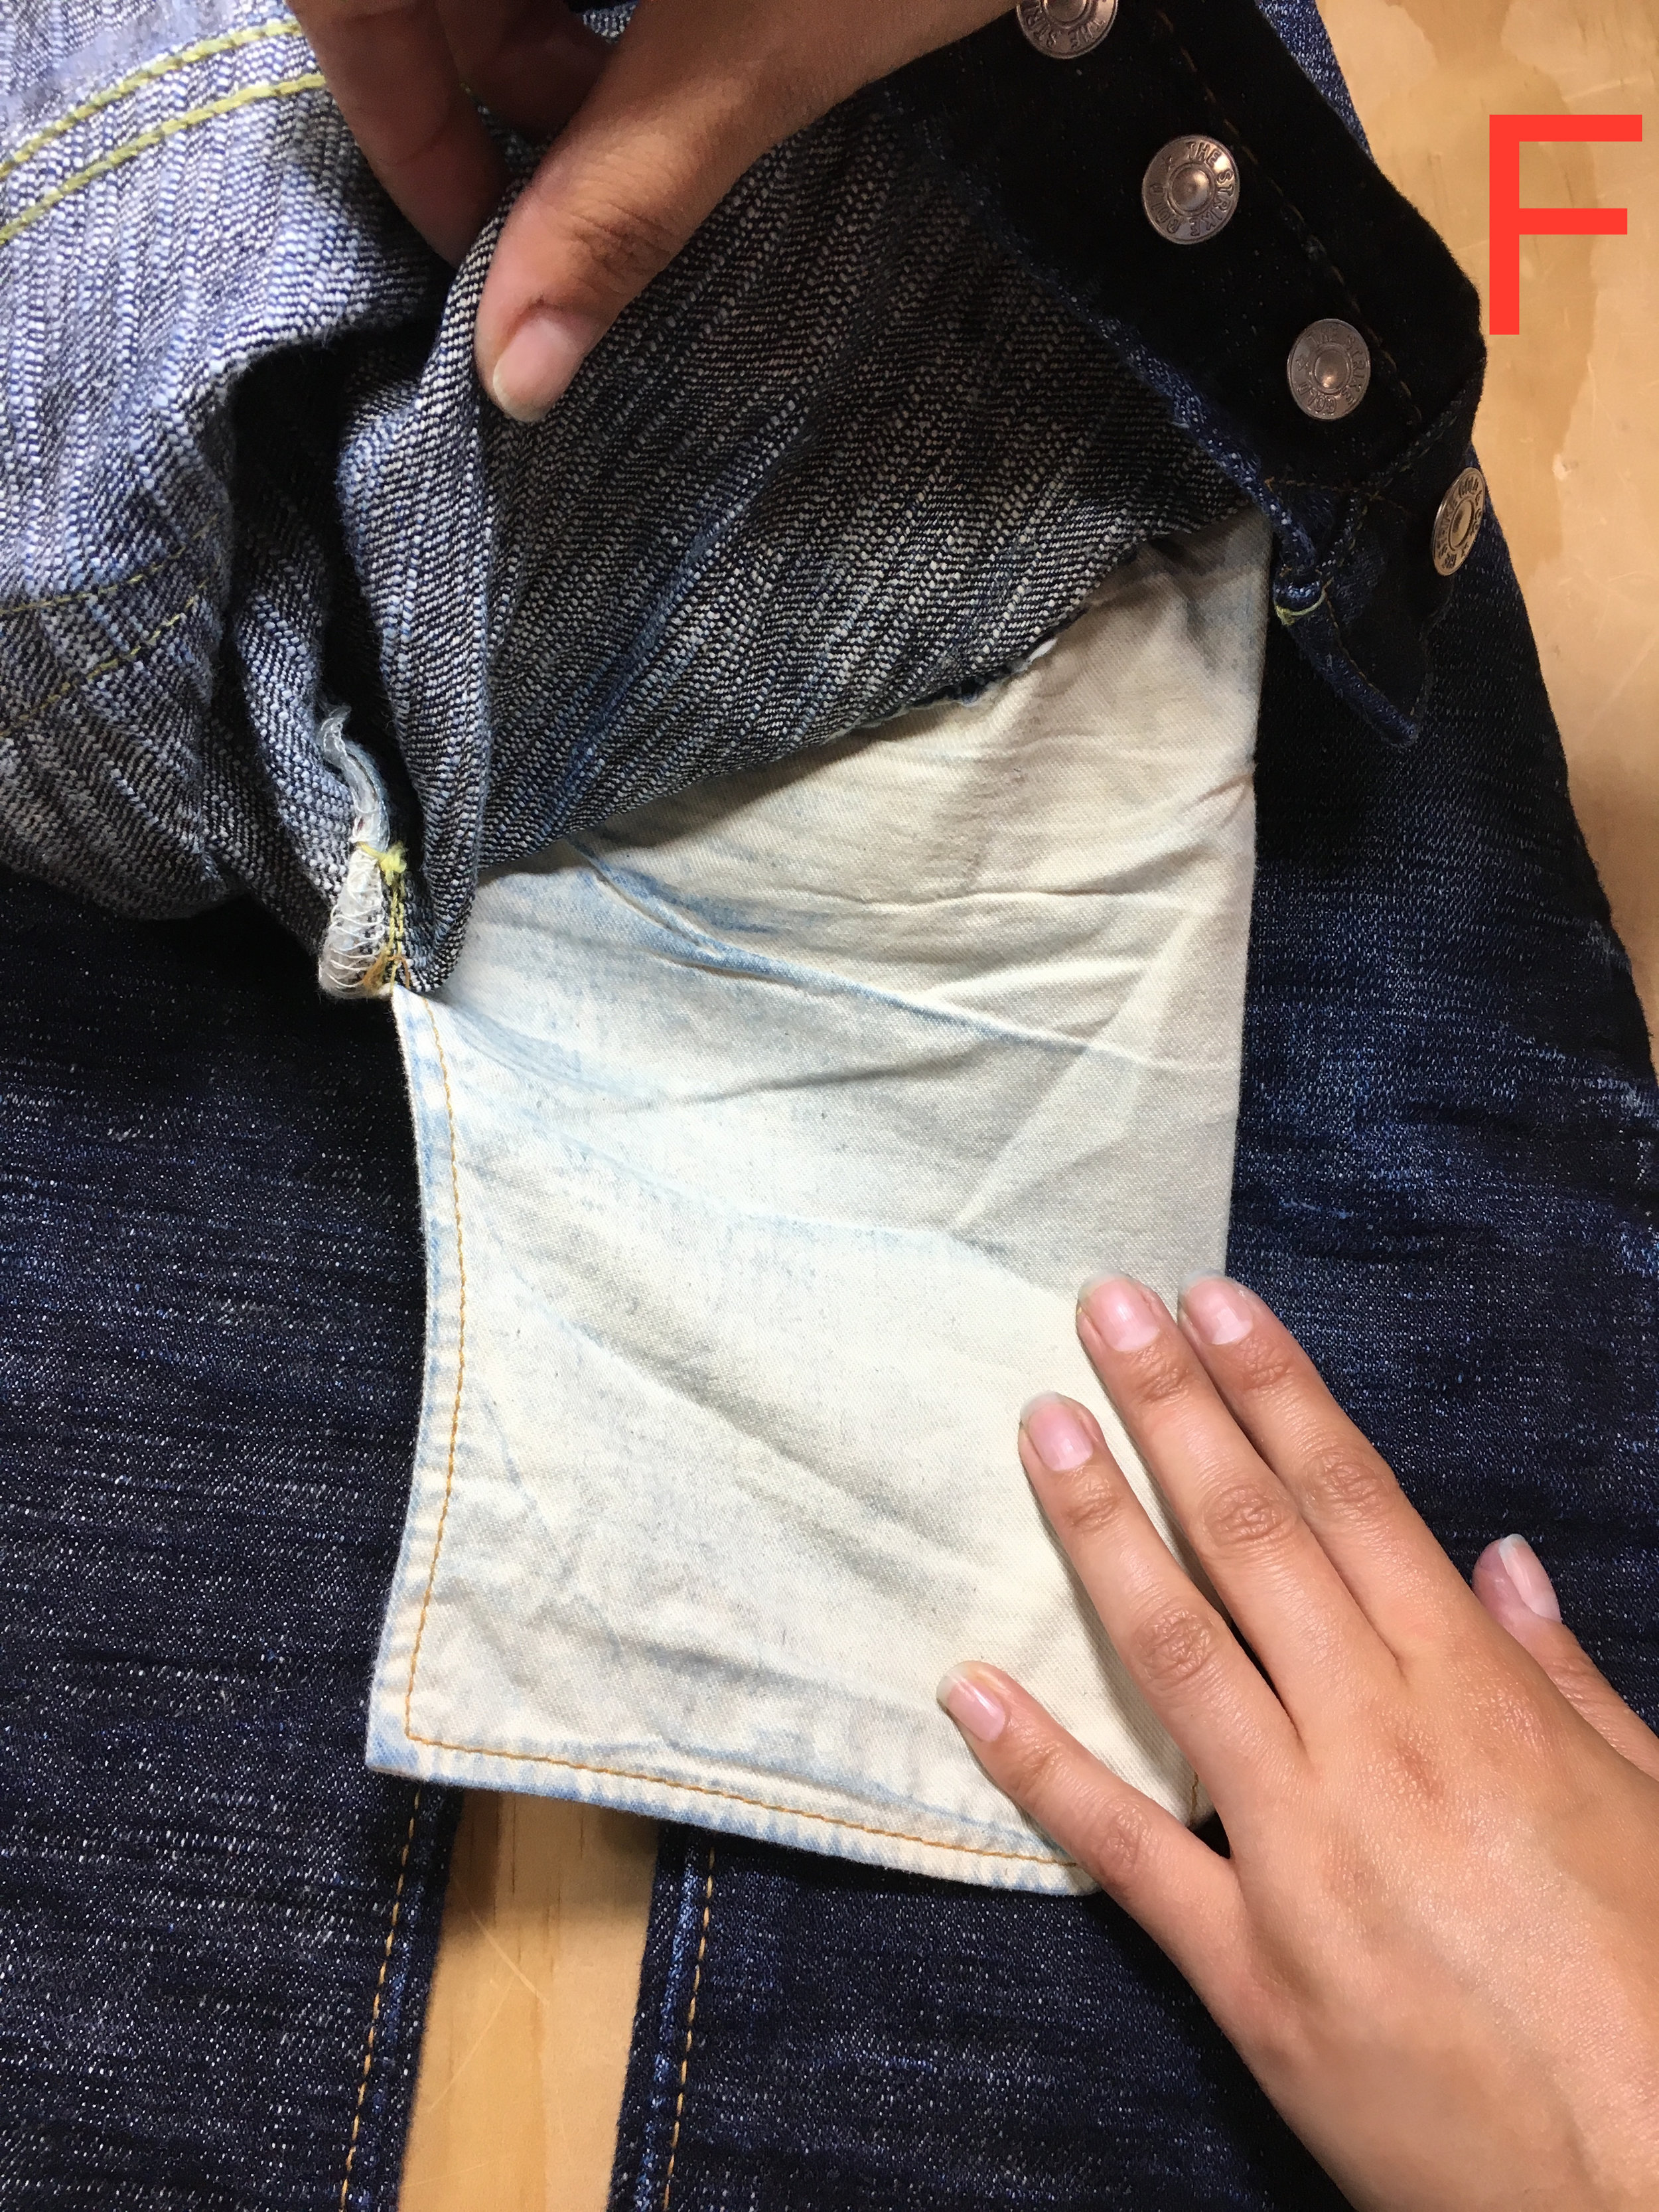
Here’s a few more examples of how to take photos of other hard-to-pose high wear areas. Cuff photos should be taken un-cuffed, and all sides that are damaged should be shown (photo D). For pocket entries and bags please take photos from both the outside in (photo E) and from the inside out, to show the pocket bags (photo F).
Maximum size allowed for your entire upload is 10MB. Please resize your photos so that each image is no larger than 2MB. When I resize photos I usually just make the longest side of the image 15”- it’s large enough to see detail but it makes it much more manageable and under 500KB.
If you submit photos that:
Are dark, poorly lit
Are blurry so you can’t see any details
Are HUGE (over 2MB per photo)
Jeans on your body while currently wearing them, not flat on a surface
I will decline your application without explanation. Please use this guide and hey you’ll get some nice damage evolution pics out of it! If you need help resizing your photos, look it up on the internet!


